giving checkout™
Adding Giving Checkout™ to your WordPress website
Your URL Your Button with HTML Your Button without HTMLYOUR URL
Using your Giving Checkout URL
Step 1
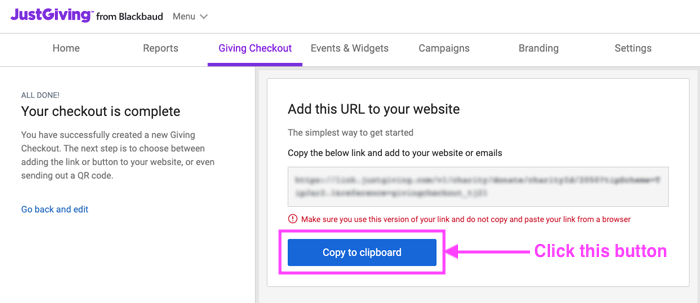
Copy your Giving Checkout URL directly from your setup wizard.
Do not copy it from your browser URL – you’ll notice your link changes when you copy it from the setup page and paste it into your browser URL – this is part of the payment security!
Step 2
Log in to your charity’s WordPress website, and navigate to the page where your existing Donate button lives, or where you’d like to add a new Donate button.
Step 3
Depending on how your WordPress site has been set up (custom theme, stock theme, no theme), you’ll be shown different options. Look for the option to add a new button or edit your existing button and replace the link with your Giving Checkout URL.
Try the steps below – these are compatible with some stock themes and sites without a theme.
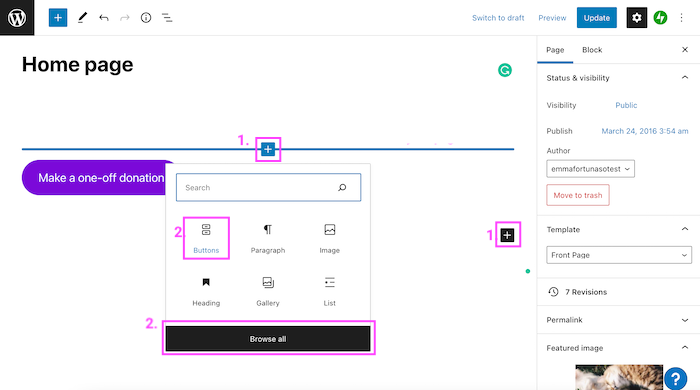
- Add a new block to your page
- Select the button block. Can’t see this block? Browse all blocks
- Add your button copy and edit the settings
- Link your button to your Giving Checkout URL
- Submit your changes and update your page
If you’re updating an existing button, simply link your button to your Giving Checkout URL and Save.

Step 4
Add or update the Donate link or button in your website menu. Depending on how your WordPress site has been set up (custom theme, stock theme, no theme), you’ll be shown different options. Look for the option to add a new menu item or edit your existing menu items and replace the link with your Giving Checkout URL.
Try the steps below – these are compatible with some stock themes and sites without a theme.
- Navigate to Appearance > Menu
- Add a new Custom link to your Menu, or edit the existing Donate link
- Save
Step 5
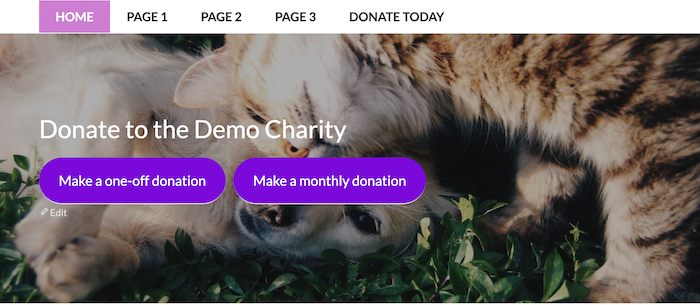
Preview your website and test your Giving Checkout form.

Using your Giving Checkout Button HTML
Step 1
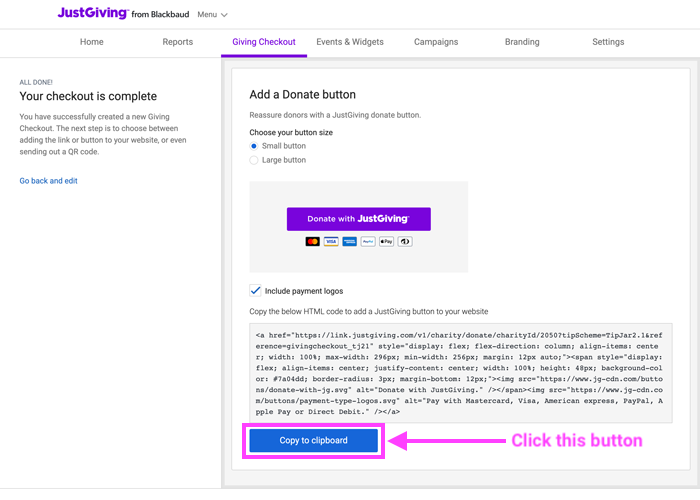
Customise and copy your Giving Checkout Button HTML directly from your setup wizard.
Step 2
Log in to your charity’s WordPress website and navigate to the page where your existing Donate button lives, or where you’d like to add a new Donate button.
Step 3
Depending on how your WordPress site has been set up (custom theme, stock theme, no theme), you’ll be shown different options. Look for the option to add custom HTML or edit your existing button custom HTML.
Try the steps below – these are compatible with some stock themes and sites without a theme. Skip to action 4 if you are updating an existing button.
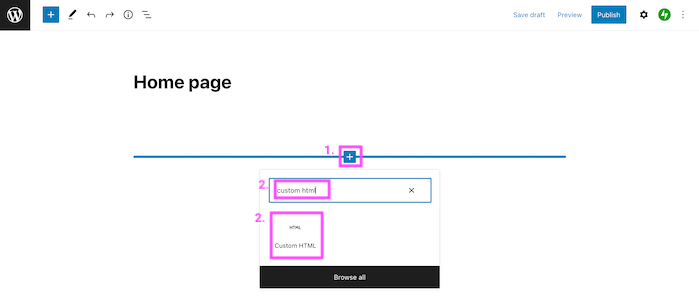
- Add a new block to your page
- Search for and select the custom HTML block. If you cannot find a custom HTML block, this might be blocked by your WordPress setup. If so, follow these steps to add a Donate Button.
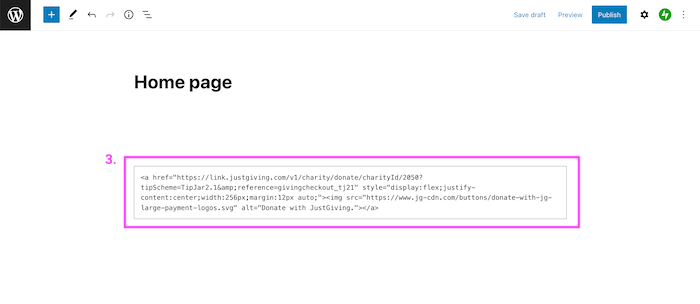
- Paste your Giving Checkout Donate Button HTML into the block
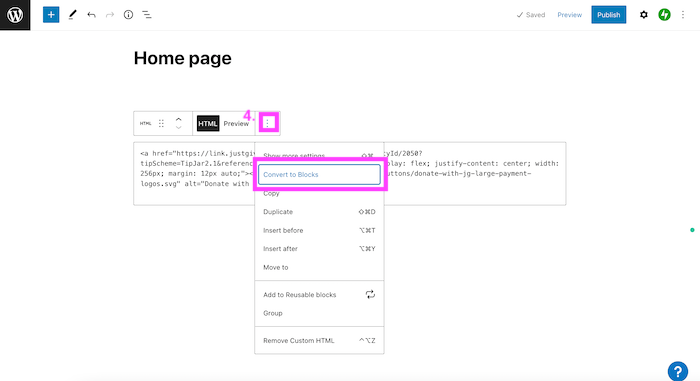
- Convert your HTML into a block to access more formatting options
Note – if this step doesn’t work, you may need to go to ‘Explore Widgets’ and search for a plug-in called ‘wpcode’. Please be advised you may need to upgrade your WordPress subscription to use this feature. Contact us if you have trouble!
Step 4
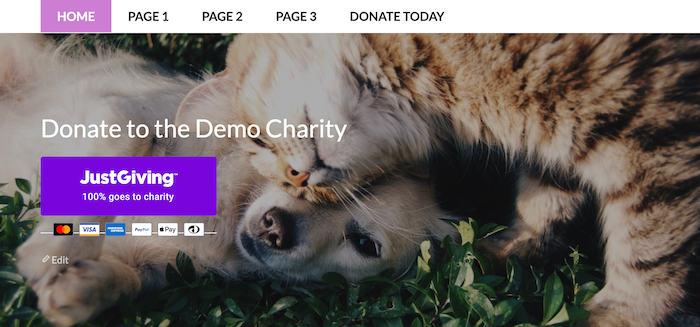
Preview your website and test your Giving Checkout form.
Using your Giving Checkout Button without HTML
Step 1
Copy your Giving Checkout URL directly from your setup wizard. Do not copy it from your browser URL – you’ll notice your link changes when you copy it from the setup page and paste it into your browser URL, it’s part of the payment security!
Step 2
Select one of our Donate Button images below or create your own button image – you can use websites like https://www.clickminded.com/button-generator/ to make your own button. Save your chosen button image on your device.
![]()

Step 3
Log in to your charity’s WordPress website and navigate to the page where your existing Donate button lives, or where you’d like to add a new Donate button.
Step 4
Depending on how your WordPress site has been setup (custom theme, stock theme, no theme), you’ll be shown different options. Look for the option to add an image or replace an existing button image.
Try the steps below – these are compatible with some stock themes and sites without a theme.
- Add a new block to your page
- Select the image block
- Follow the prompts to search for your chosen image on your device
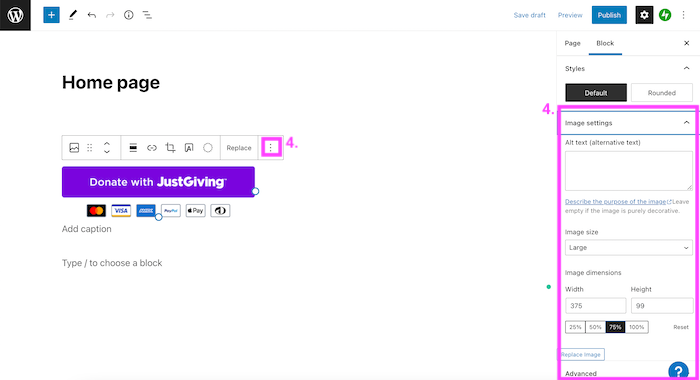
- Open the image block settings and update where necessary
- Link your image to your Giving Checkout URL
Step 5
Preview your website and test your Giving Checkout form.


Get Started with Giving Checkout
You can create an unlimited number of Giving Checkout forms, with different customisation options to suit your charity’s needs. Log in and explore Giving Checkout today.